Quickstart
Generate your first AI-optimized blog post with Waldium. This guide shows you how to create content through both the user interface and API, so you can choose the approach that works best for your workflow.
Before you can make API requests, you'll need to get your API key from your dashboard. You can find it under Settings » API Keys.
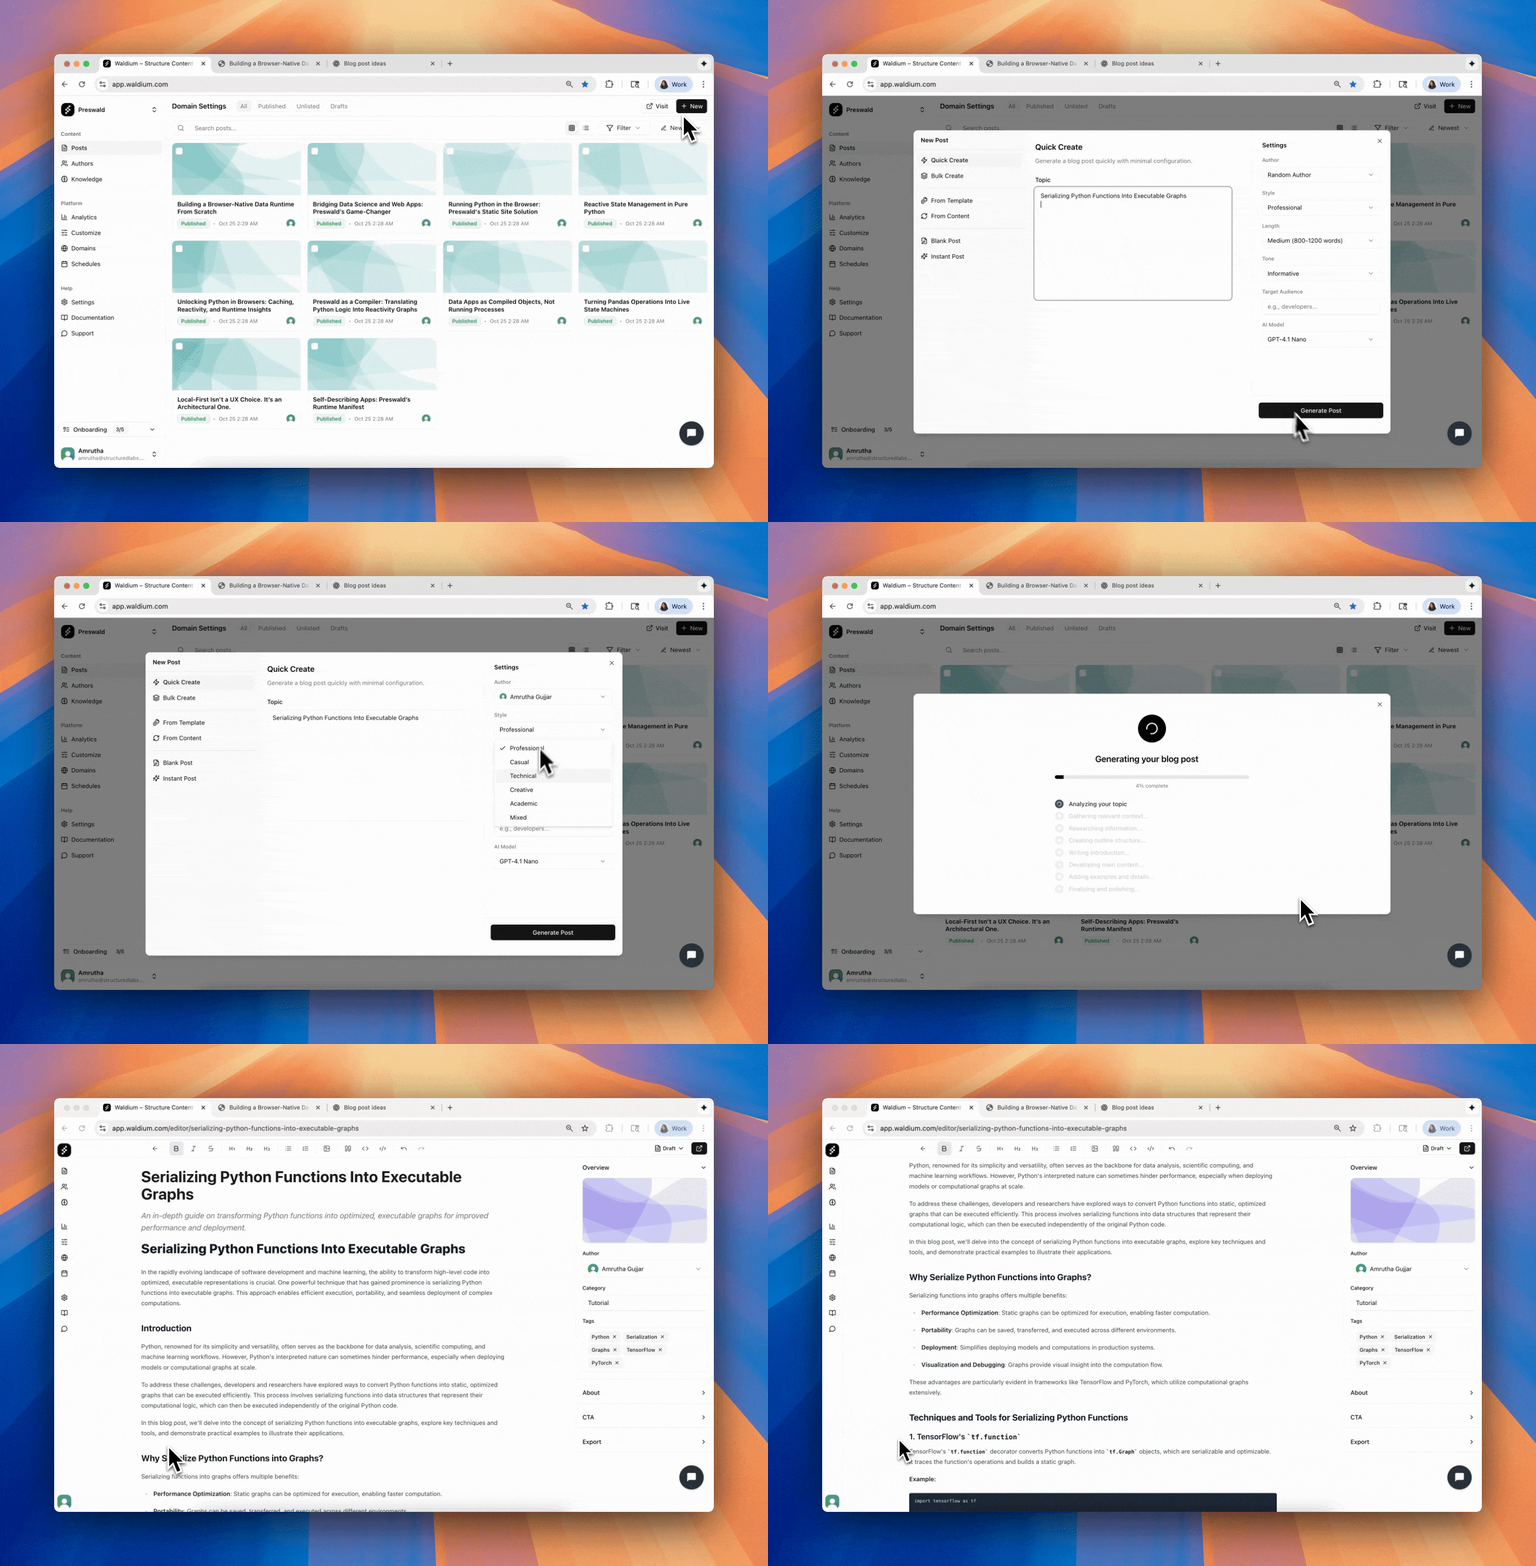
Generate a post through the UI
The easiest way to get started is through the Waldium dashboard. Here's how to create your first AI-generated blog post:
- Create a new post - Click "Create Post" in your dashboard
- Enter a topic - Add a title like "The Future of AI in Content Marketing"
- Generate content - Click "Generate Content" and choose your style, tone, and length
- Review and publish - Edit the generated content if needed, then publish

Generate a post through the API
You can accomplish the same thing programmatically using the API. Here's how to generate a blog post with a simple API call:
curl -X POST https://api.waldium.com/api/v1/posts/generate \
  -H "Authorization: Bearer YOUR_API_KEY" \
  -H "Content-Type: application/json" \
  -d '{
    "topic": "The Future of AI in Content Marketing",
    "style": "professional",
    "length": "medium",
    "tone": "informative"
  }'
The API will return a generated blog post that you can then publish, edit, or use in your application.
What's next?
Great! You've generated your first AI-optimized blog post. Here are some next steps to explore Waldium's full capabilities:
- Upload documents to your knowledge base to enhance content generation
- Set up webhooks to automate your content workflow
- Configure custom domains for your blog
- Learn about error handling for robust API integration
- Get your API key if you haven't already